openSUSE MicroOS is one of openSUSE’s most exciting projects, and for me has replaced openSUSE Leap as my go-to server operating system of choice. I currently have 3 MicroOS installations, all running as podman with openSUSE containers. The machines are as follows:
- A nice fanless Zotac x86-64 NUC running at home as my Nextcloud and ssh-based backup server/NAS
- A VM on Hetzner Cloud running this blog, my saltstack master and a few other public facing services. (Kudos to Hetzner for adding the openSUSE MicroOS ISO to the list of Cloud ISOs so I could do a custom installation)
- A VM on Linode for running a US-based proxy for some of my friends who otherwise might have too-high latency accessing services on the Hetzner host. (Kudos to Linode for consistantly supporting openSUSE Leap releases on the day of release and providing ways of doing custom installs of any OS)
And so, with all these MicroOS boxes in my life, as reliable as they may be, I wanted to have a simple way of keeping an eye on whether or not the machines are up or not, possibly evolving to more interesting checks in the future. I wanted this to be able to monitor my machines even when my main laptop at home is off, and I wanted to not have to worry about updating the monitoring system at all. So an idea formed, why not use MicroOS to monitor MicroOS?
Hardware Used
I cobbled this little project together out of random bits of hardware I had lying around, namely:
- Raspberry Pi 3B+ with the official RPi case
- Joy IT 3.2” TFT display with 3 GPIO buttons
- 32GB micro SDCard
- 8GB random old USB stick
Software Used
I found a very nice command-line visualisation tool called sampler that perfectly fit my needs for this project. It’s nice and small, lets you draw graphs based on numbers it gets from whatever shell commands you run at whatever frequency you tell it to poll. It can also produce alerts if the results do not match expected values. So given the basic monitoring I want is basically just a ping and be alerted if they stopped responding, sampler is absolutely perfect. I packaged it for openSUSE as part of this project so it’s now available for regular Tumbleweed as well as MicroOS.
Installing MicroOS on the SDCard
First I needed to download the latest official openSUSE MicroOS aarch64 image for Rasbperry Pi from the official download page. For this project we’re using a plain old MicroOS image without any pre-installed services, not the Container Host images which come with podman.
wget https://download.opensuse.org/ports/aarch64/tumbleweed/appliances/openSUSE-MicroOS.aarch64-RaspberryPi.raw.xz
Putting in the SDCard into the reader, I simultaniously extracted the image and wrote it direct to the image with the following command. (Substitue sdX with the correct name for your SDCard device)
xzcat openSUSE-MicroOS.aarch64-RaspberryPi.raw.xz | dd bs=4M of=/dev/sdX iflag=fullblock oflag=direct status=progress; sync
And that’s it, the SDCard is ready to go…or is it?
But Wait!
By default, MicroOS images have no root password, no user accounts, and no services installed. I needed to have some way to setup the Pi when it first boots from the SDCard. MicroOS has two tools available for such first boot configuration:
- Ignition, originally from CoreOS which has a lovely structured JSON config but a limited scope of what it can setup.
- Combustion, written specifically for MicroOS and capable of doing anything you can write in a shell script.
As I already had a feeling I’d need to do some quirky things, especially to get the TFT display running, I opted to use combustion. I could have used ignition for the easy stuff and left combustion in combination for the trickier parts but it seemed silly to me to have to learn how to write a new JSON config file when I could just as easily write everything in a shell script.
Preparing a combustion USB stick
On first boot combustion looks for a device with a volume named combustion containing a directory called combustion and a script called script so that’s precisely what I did to my USB stick
mkfs.ext4 /dev/sdY
e2label /dev/sdY combustion
mount /dev/sdY /mnt
mkdir -p /mnt/combustion/
touch /mnt/combustion/script
After a few trial runs and a bit of hacking around the final script now looks like this:
#!/bin/bash
# combustion: network

## Copy config and device tree overlays for Pi TFT & GPIO buttons to /boot/efi
cp extraconfig.txt /boot/efi/
cp joy-IT-Display-Driver-32b-overlay.dtbo /boot/efi/overlays/
cp tft_keys.dtbo /boot/efi/overlays/

## Change boot params so framebuffer console goes to TFT display
sed -i "/^GRUB_CMDLINE_LINUX_DEFAULT=/ s/\"$/ fbcon=map:10\"/" /etc/default/grub
grub2-mkconfig -o /boot/grub2/grub.cfg

## Mount /var and /home so user can be created smoothly
mount /var
mount /home

## Make user
useradd -m ilmehtar

## Add user to sudoers
echo "ilmehtar ALL=(ALL) NOPASSWD: ALL" > /etc/sudoers.d/ilmehtar

## Create ssh folder and populate authorized_keys for remote sshd
mkdir -pm700 /home/ilmehtar/.ssh
chown ilmehtar:users -R /home/ilmehtar/.ssh
cat authorized_keys > /home/ilmehtar/.ssh/authorized_keys

## Setup vconsole so framebuffer console has right font/keyboard layout (Optional)
cp vconsole.conf /etc/vconsole.conf

## Setup Wifi
cp wpa_supplicant.conf /etc/wpa_supplicant/wpa_supplicant.conf
systemctl enable wpa_supplicant@wlan0.service
cp /etc/sysconfig/network/ifcfg-eth0 /etc/sysconfig/network/ifcfg-wlan0

## Disable IPv6 (Optional)
cp 90-disableipv6.conf /etc/sysctl.d/

## Install sampler
zypper --non-interactive install sampler
cp sampler.yaml /home/ilmehtar/sampler.yaml

## Make user login by default
mkdir -p /etc/systemd/system/getty@tty1.service.d
cp autologin.conf /etc/systemd/system/getty@tty1.service.d

## Make sampler run by default
echo "[ \$TERM = 'linux' ] && sleep 30 && sampler -c ~/sampler.yaml" >> /home/ilmehtar/.bashrc

## Reboot after setup
cp firstbootreboot.service /etc/systemd/system/
systemctl enable firstbootreboot.service

## Clear up mounts
umount /var
umount /home
The script references a number of additional files, all of which are placed alongside script in the combustion directory on the USB stick:
File Listing of the combustion directory
90-disableipv6.conf
authorized_keys
autologin.conf
extraconfig.txt
firstbootreboot.service
joy-IT-Display-Driver-32b-overlay.dtbo
sampler.yaml
script
tft_keys.dtbo
tft_keys.dts
vconsole.conf
wpa_supplicant.conf
Joy-IT-Display-Driver-32b-overlay.dtbo is a Device Tree overlay provided by the manufactorer of the TFT hat. tft_keys.dtbo is my own Device Tree overlay compiled from tft_keys.dts. All the other files are text files used to configure various aspects of the system to my liking and are documented at the bottom of this post for anyone wanting to use this idea as a basis for their own projects.
First Boot
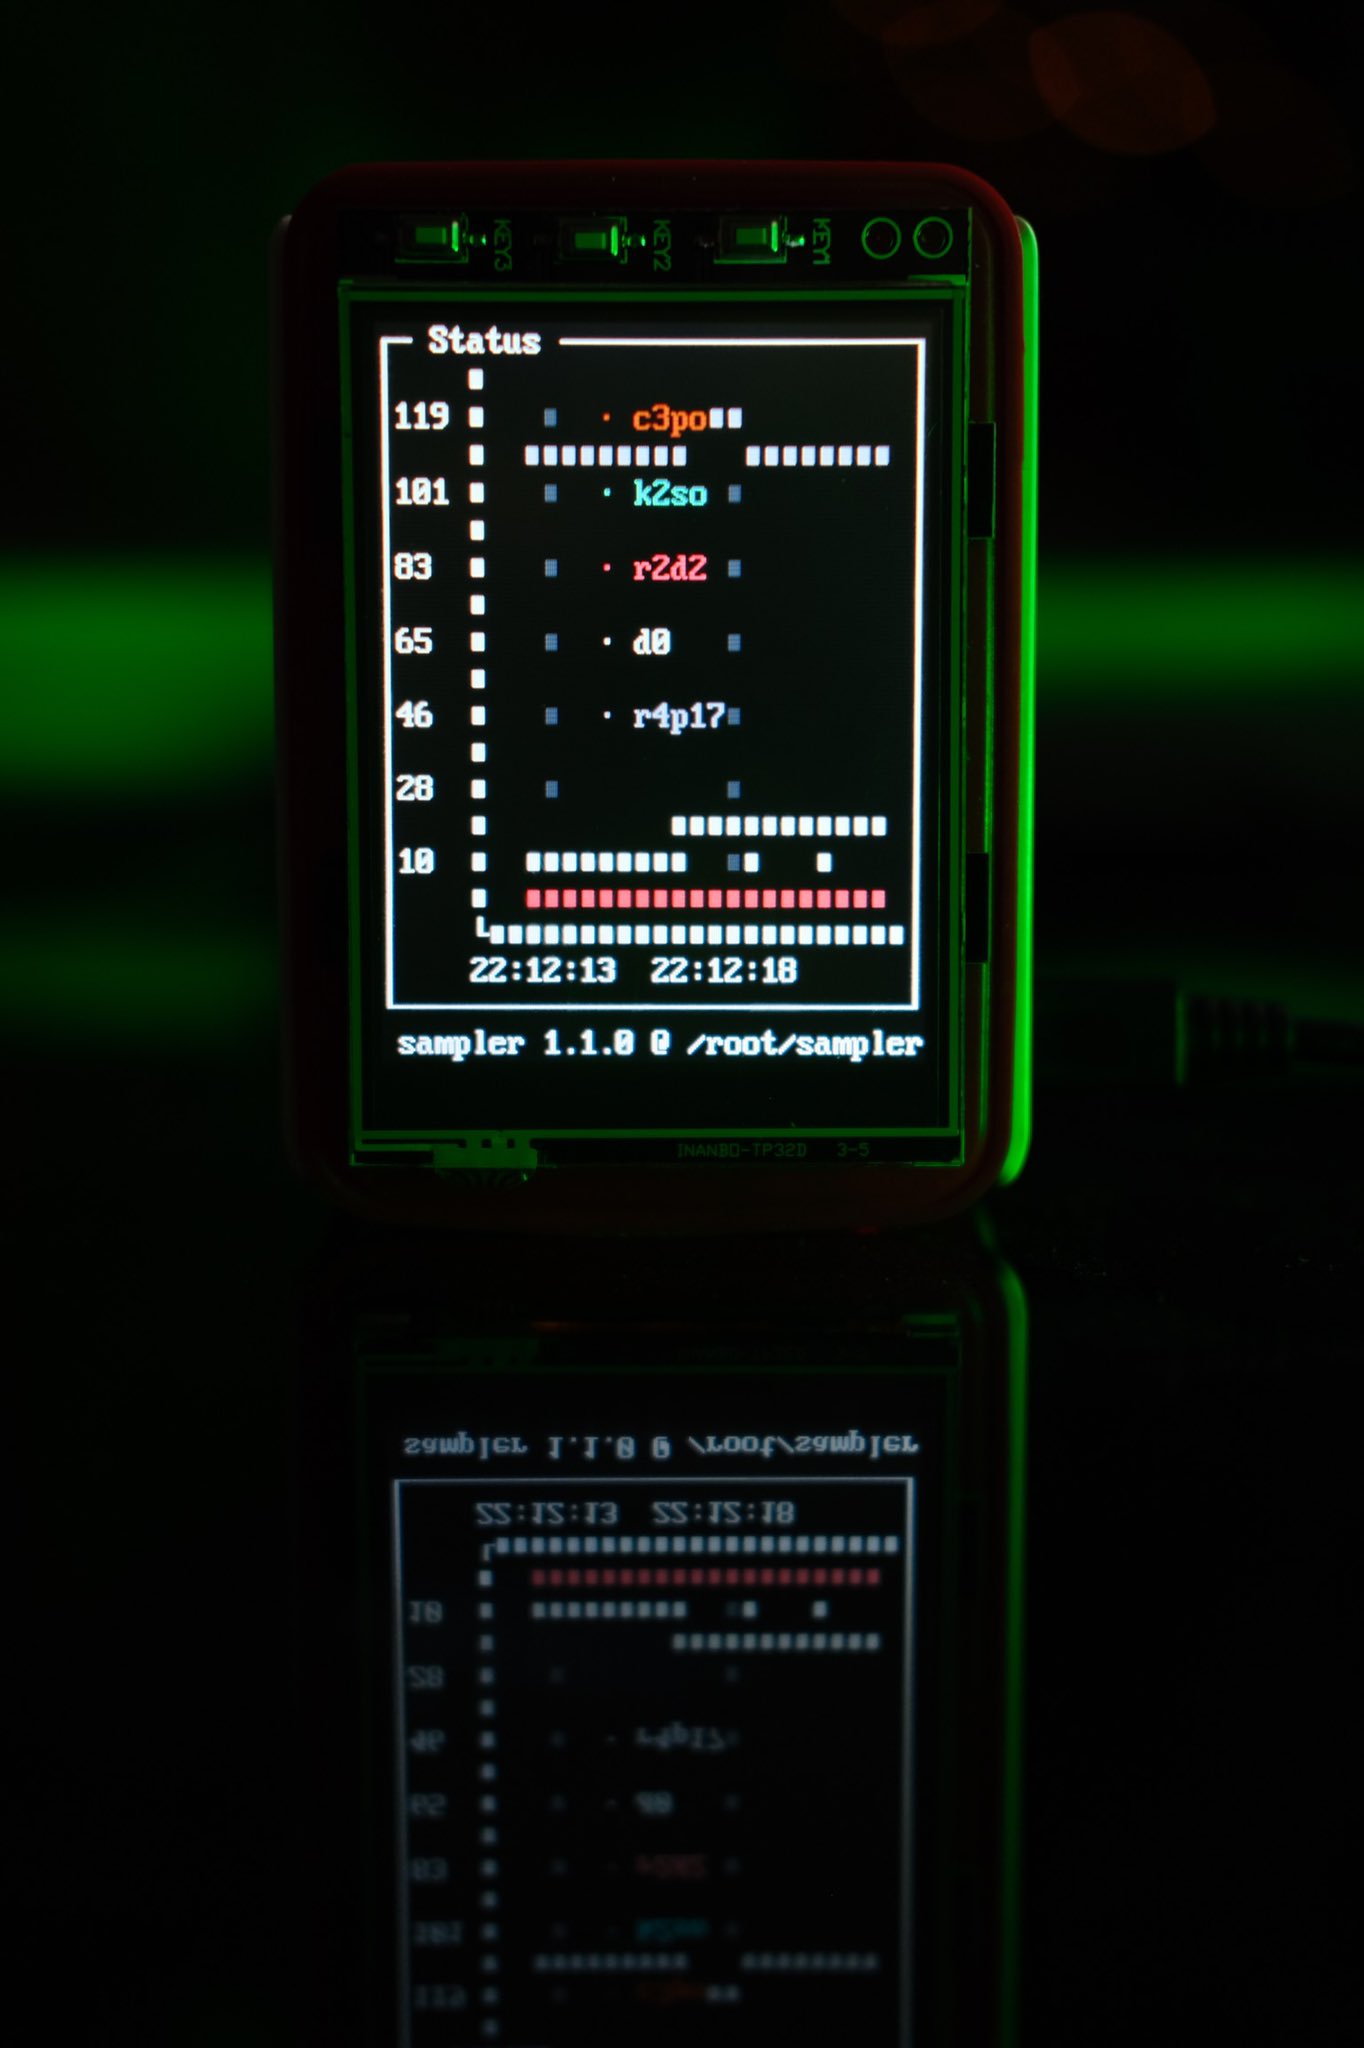
And with all that prep work done, the first boot is now surprisingly easy. I inserted the SDCard, added the USB stick and connected the Pi to ethernet (The wifi won’t work until it’s configured by combustion). Powering on the Pi the whole device can be left alone for a few minutes. It boots itself, does all of the configuration, and the end result is a nice working desktop network monitor:
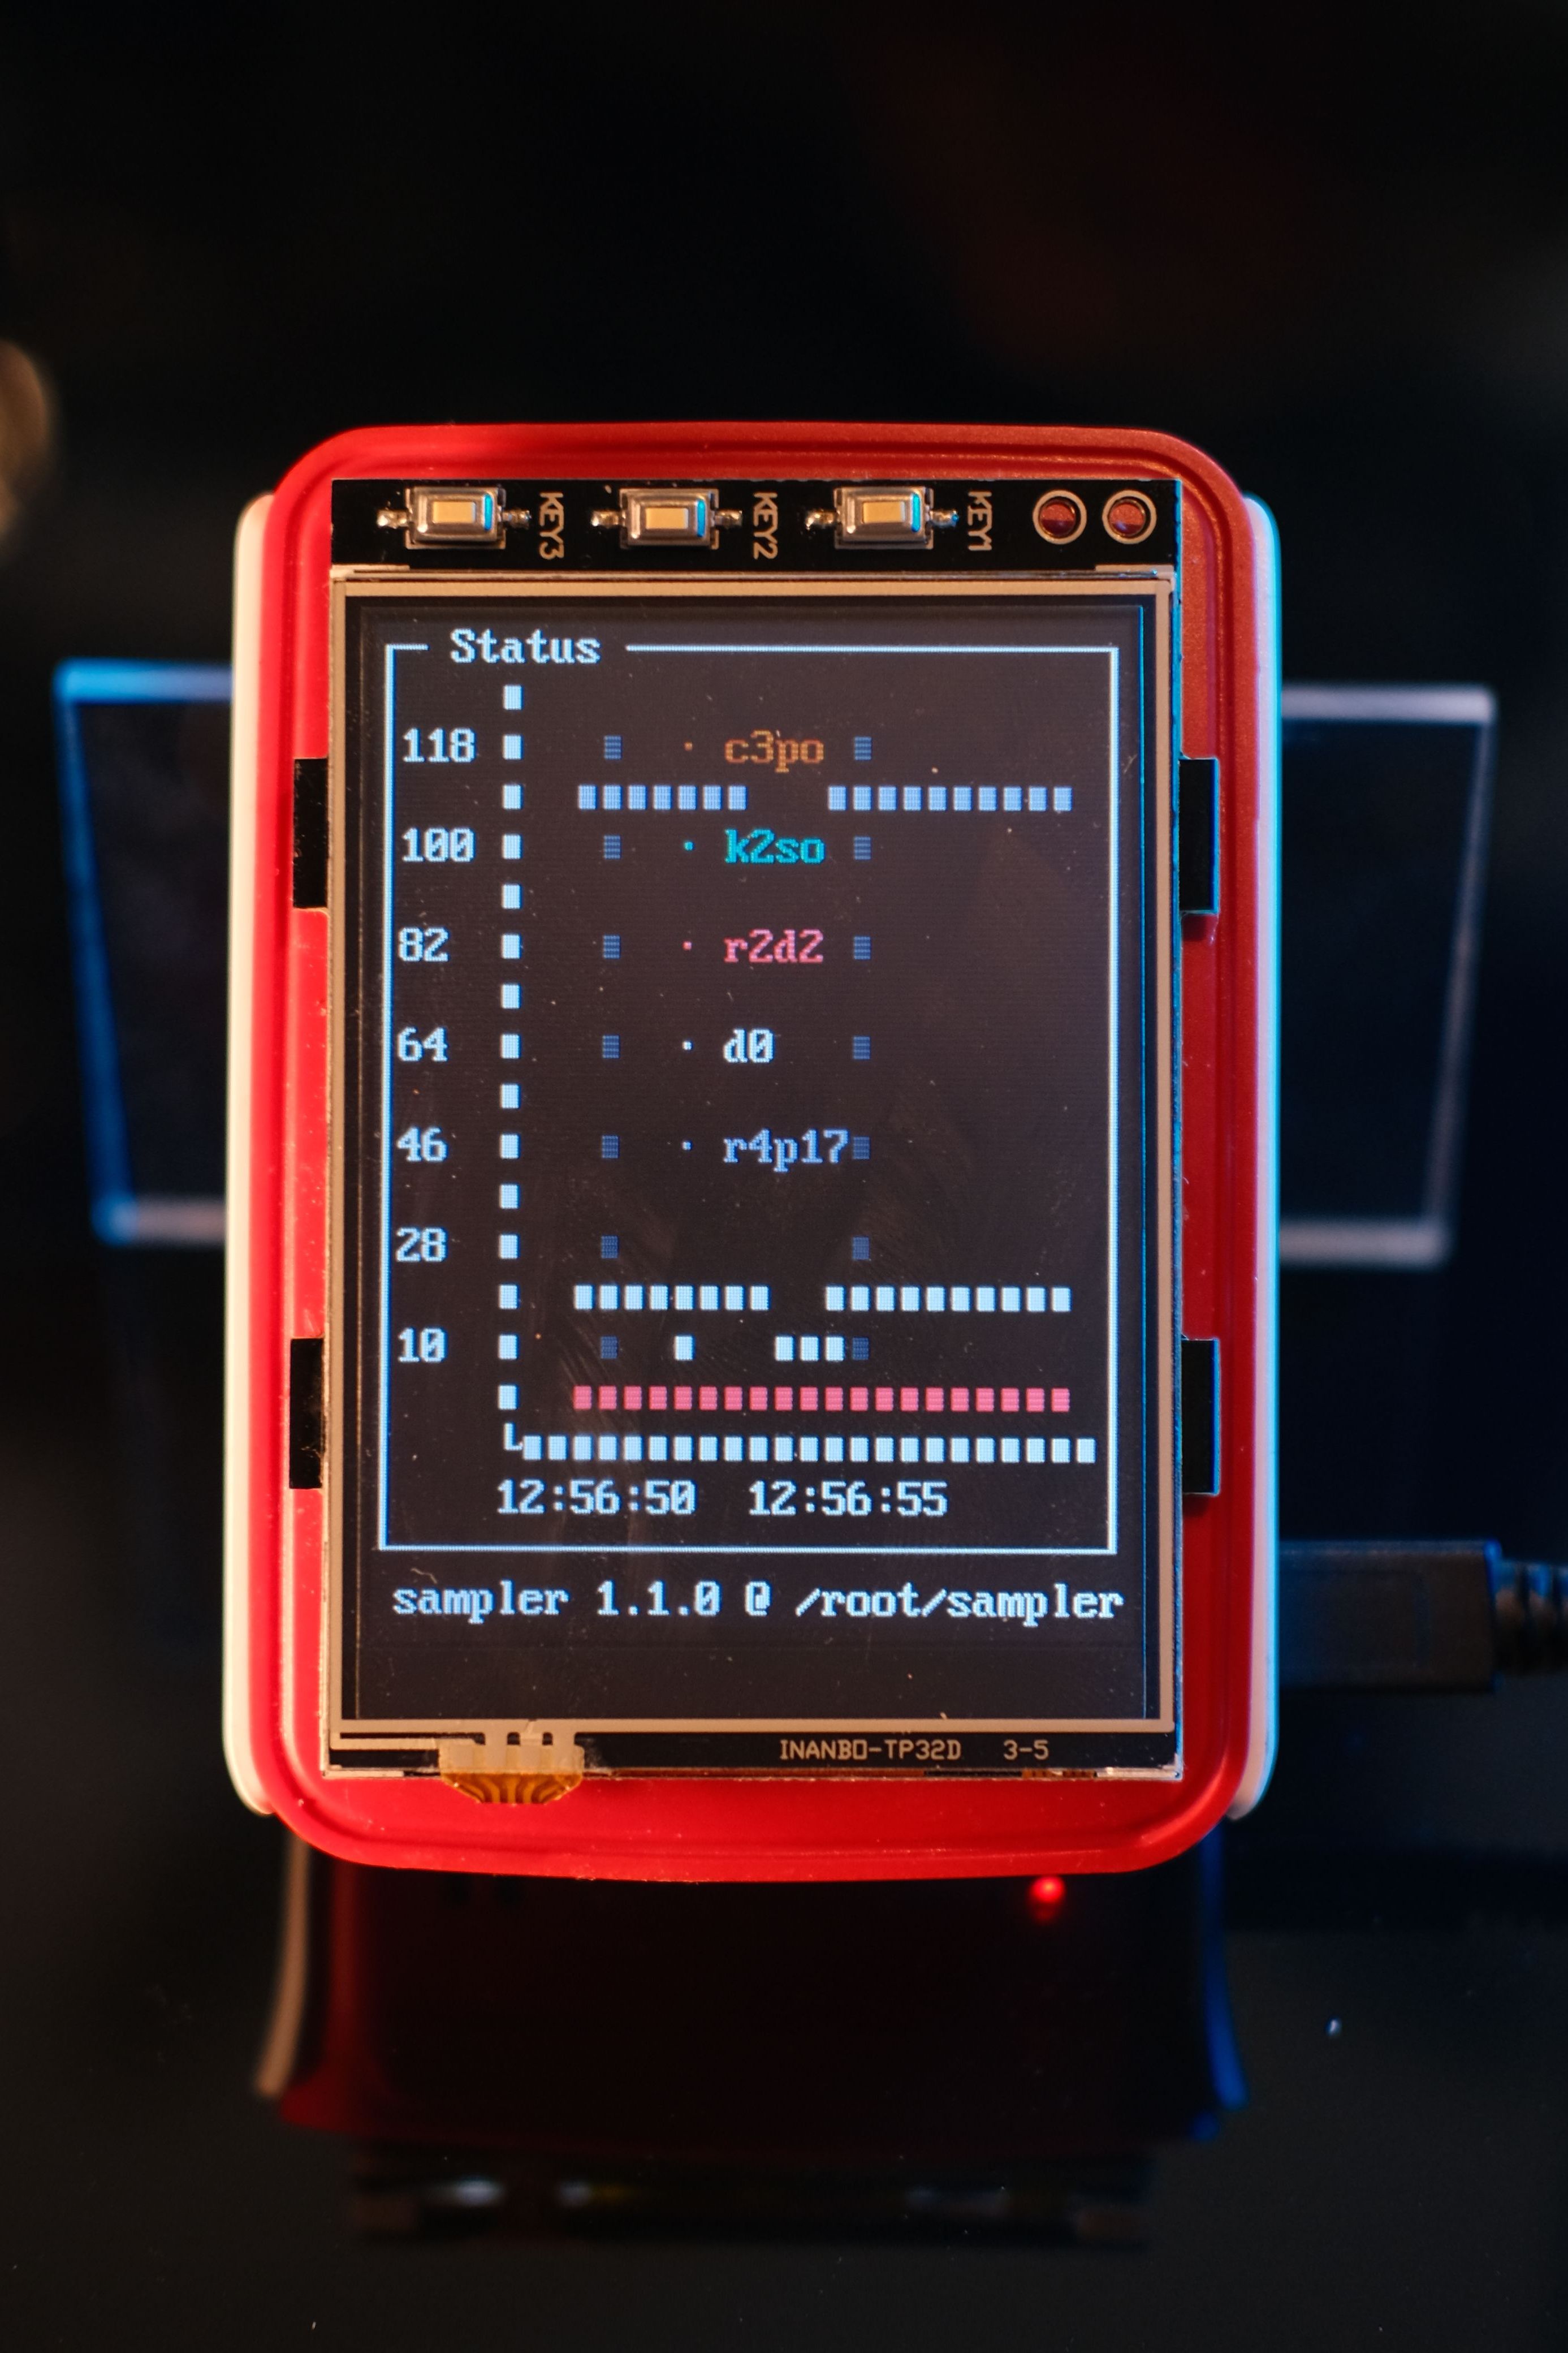
The GPIO switches on the top even work as the P and ESC keys for sampler, allowing me to pause the polling or dismiss any alerts. A little bit of hardware hacking (read: hot glue and acryrlic) finished of the project with a little stand so the whole thing sits on my desk at an angle easy for me to read.
The system doesn’t have any passwords, so can’t be logged in remotely with the exception of ssh using the non-root user using my existing public key. Simple and secure enough.
All this might seem like a little overkill, I realise it probably is, but one great benefit of having everything in this one combustion script is now I know I can wipe that SDCard or use a new Pi and get it back up and running to exactly how I like it directly from the first boot, without any manual intervention at all. Which I guess means I could reuse this Pi for other projects..anyone got any ideas?
Thanks and Have a Lot of Fun
Additional Config Files Used (For Reference)
90-disableipv6.conf
net.ipv6.conf.all.disable_ipv6 = 1
net.ipv6.conf.default.disable_ipv6 = 1
net.ipv6.conf.lo.disable_ipv6 = 1
autologin.conf
[Service]
ExecStart=
ExecStart=-/sbin/agetty -a ilmehtar %I $TERM
extraconfig.txt
dtoverlay=joy-IT-Display-Driver-32b-overlay:rotate=0,swapxy=1
dtoverlay=tft_keys
gpio=18,23,24=pu
dtparam=audio=on
max_usb_current=1
hdmi_force_hotplug=1
config_hdmi_boost=7
hdmi_drive=1
hdmi_ignore_edid=0xa5000080
firstbootreboot.service
[Unit]
Description=First Boot Reboot

[Service]
Type=oneshot
ExecStart=rm /etc/systemd/system/firstbootreboot.service
ExecStart=rm /etc/systemd/system/default.target.wants/firstbootreboot.service
ExecStart=systemctl reboot

[Install]
WantedBy=default.target
sampler.yaml
runcharts:
  - title: Status
    position: [[0, 2], [80, 40]]
    rate-ms: 1000
    triggers:
      - title: Node Down
        condition: '[ $cur = "DOWN" ] && echo 1 || echo 0'
        actions:
            visual: true
    legend:
        enabled: true
        details: false
    scale: 0
    items:
      - label: node1
        sample: ping -qc5 192.168.1.1 2>&1 | awk -F'/' 'END{ print (/^rtt/? $5:"DOWN")
            }'
      - label: node2
        sample: ping -qc5 192.168.1.2 2>&1 | awk -F'/' 'END{ print (/^rtt/? $5:"DOWN")
            }'
      - label: node3
        sample: ping -qc5 192.168.1.3 2>&1 | awk -F'/' 'END{ print (/^rtt/? $5:"DOWN")
            }'
      - label: node4
        sample: ping -qc5 192.168.1.4 2>&1 | awk -F'/' 'END{ print (/^rtt/? $5:"DOWN")
            }'
      - label: node5
        sample: ping -qc5 192.168.1.5 2>&1 | awk -F'/' 'END{ print (/^rtt/? $5:"DOWN")
            }'
tft_keys.dts
/dts-v1/;
/plugin/;
/ {
	compatible = "brcm,bcm2835";

	fragment@0 {
		target-path = "/soc";
		__overlay__ {
			tft_keys{
				compatible = "gpio-keys";
				autorepeat;
				key1 {
					label = "Key 1";
					linux,code = <1>;
					gpios = <&gpio 18 1>;
				};
                                key2 {
                                        label = "Key 2";
                                        linux,code = <25>;
                                        gpios = <&gpio 23 1>;
                                };
                                key3 {
                                        label = "Key 3";
                                        linux,code = <1>;
                                        gpios = <&gpio 24 1>;
                                };
			};
		};
	};
};
vconsole.conf (Because uk layout is best keyboard layout)
KEYMAP=uk
FONT=eurlatgr.psfu
FONT_MAP=
FONT_UNIMAP=
wpa_supplicant.conf
network={
   ssid="My-SSID"
   psk="MyPassword"
}